


Of course, just like datasets during scheduled refresh, they send information that something went wrong and the update did not occur. But we only have a few places in the Power BI Service that would show us all dataflow updates at once or allow us to get them selectively. So we have to browse the workspaces where these dataflows are located and get this information ourselves.
For that reason, I’d like to share with you some options that might help you along the way.
Monitoring of critical dataflows
We can agree that often not all dataflows are critical. But for those that are, we need to follow them in great detail and have a good overview. It is good to be able to monitor such dataflows almost on a near real-time basis so that we can act quickly!
Since there are usually not hundreds of such dataflows but rather units or smaller tens, the possibility of using the integration between Power Automate and Power BI Push Datasets is offered.
If I were to outline how it works: “After the Dataflow update, a Power Automate flow could be started, which evaluates the update and writes it to the Power BI Push dataset. At the same time, based on the result of the update, it may notify the dataflow manager to resolve the situation immediately”. This scenario is straightforward today within Power Automate and Power BI integration.
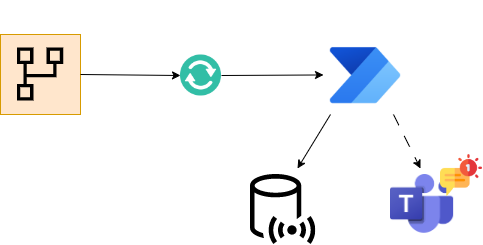 Diagram
Sample for extracting refresh data from Dataflow
To demonstrate, I’m using a Dataflow called Orders, and I consider it critical, and I need to be sure that the update has gone through, or I need to know about it immediately.
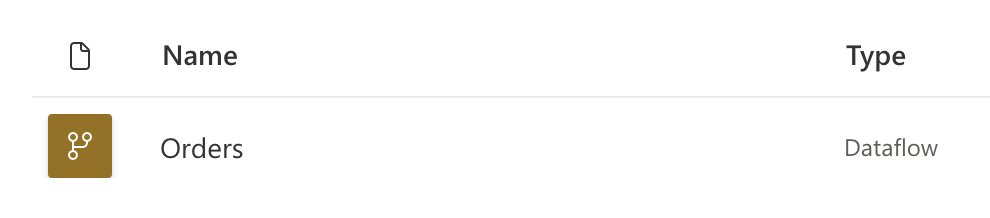 Prepared Dataflow - Orders
By itself, this Dataflows runs beautifully. It can be updated, and updates are scheduled. But how can Power Automate help me now?
Within the trigger options for Power Automate, there is the option of using the so-called “automated” trigger.
 Automated Trigger of Power Automate
And among its options is one option called “When a dataflow refresh completes.”
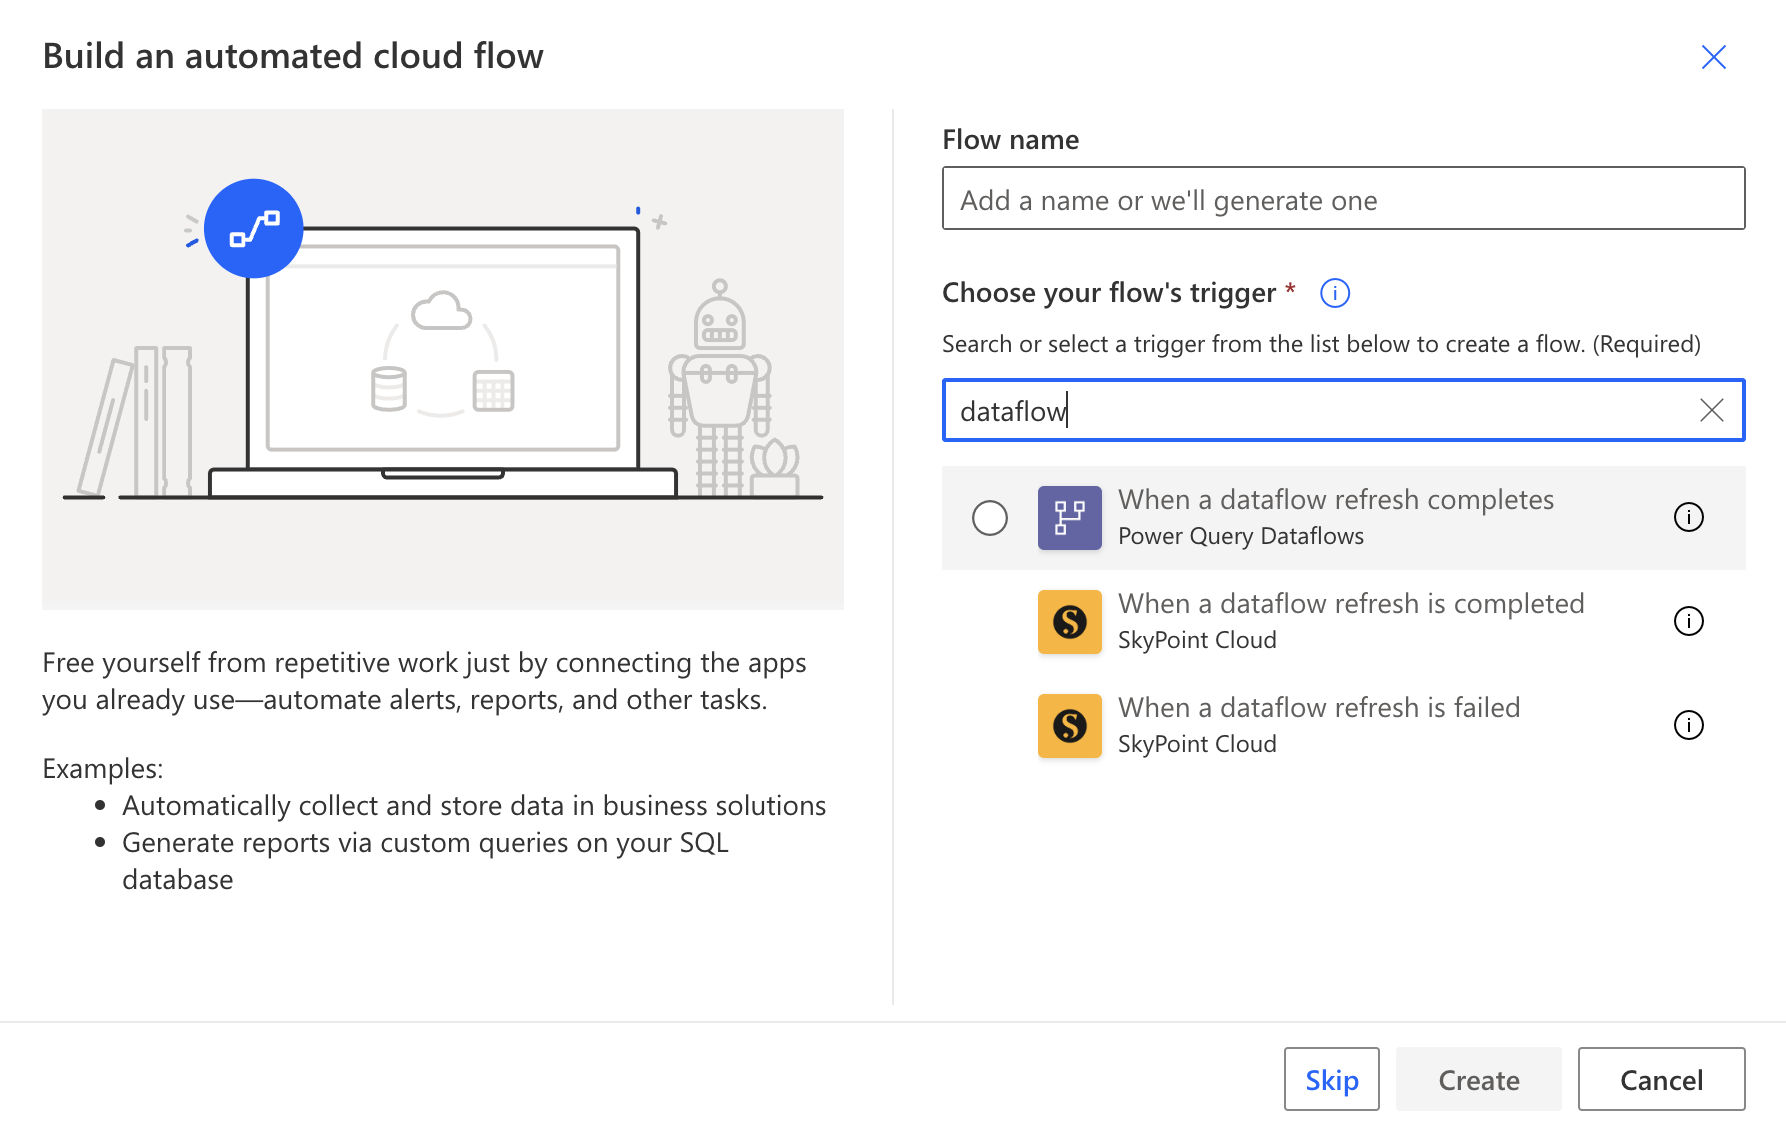 Trigger for Power Automate
This trigger can work with both user access and Service Principal. This can be seen in the following images:
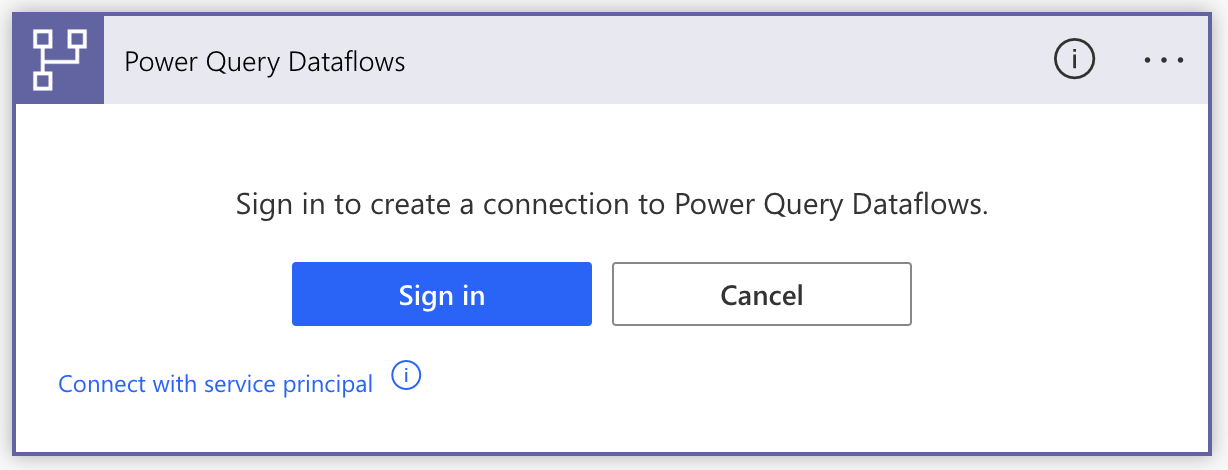 User Access
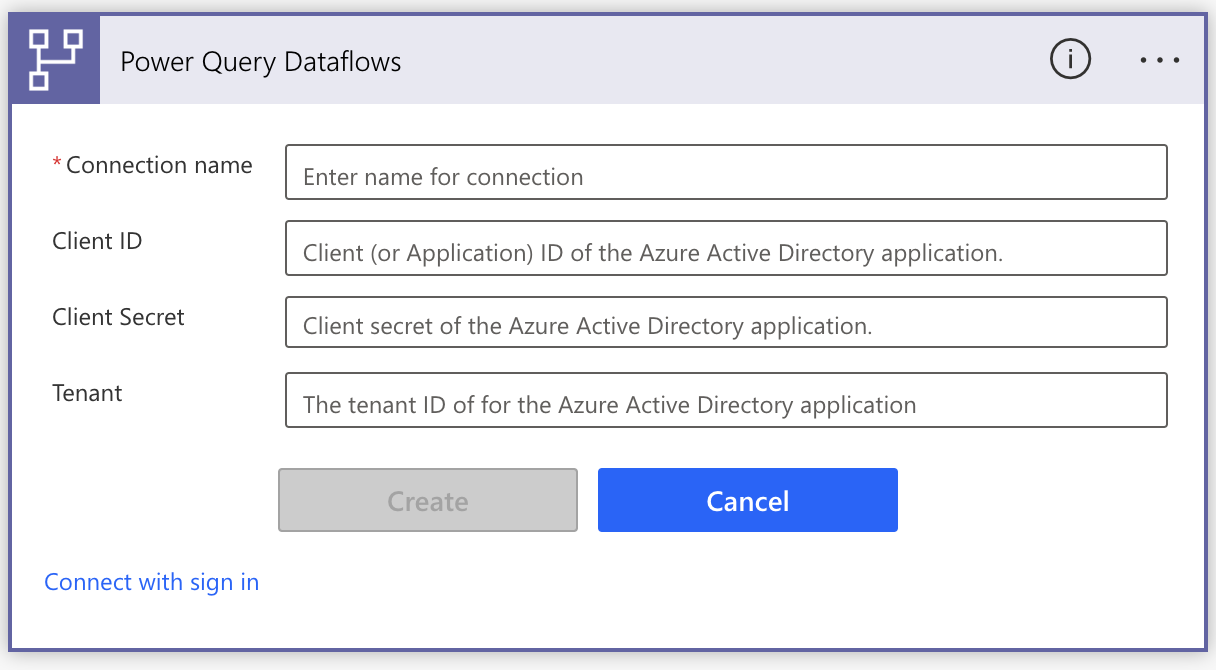 Service Principal Access
Both options will work approximately similarly. You always need access/permissions to the given workspace where the Dataflow is stored / directly on dataflows. After logging in, you can choose the work type of the workspace (Workspace = Power BI, Environment = Power Apps), then the specific variant where you have Dataflow, and, of course, the Dataflow itself.
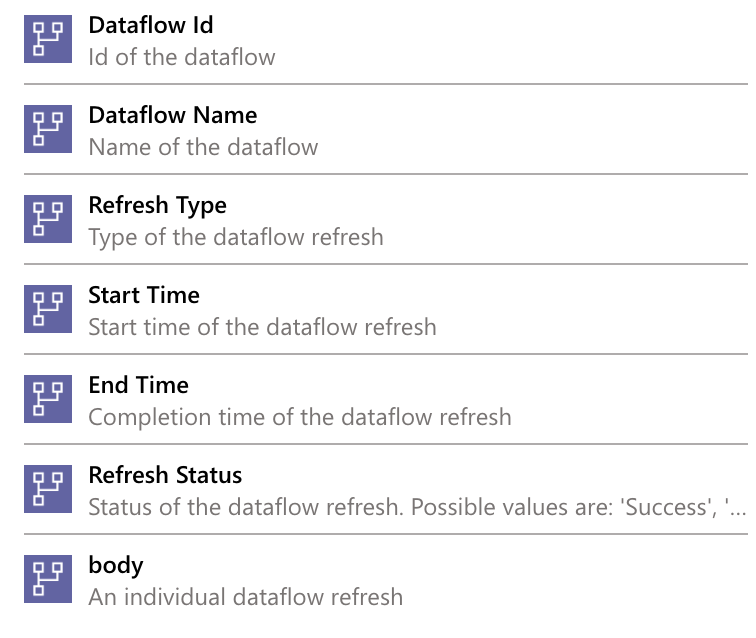
This trigger then returns the following values from the update:
 Dataflow attributes
If you don’t work with Power Automate often, you may be surprised by the return value called “body.” It is a value that contains the total received messages from API communication. So it’s JSON with other attributes.
The important thing is that we already know what attributes we will get after our Dataflow is updated. Because thanks to this, we can prepare a Power BI Push or Streamed dataset to which we will pass this information!
 Streaming Dataset
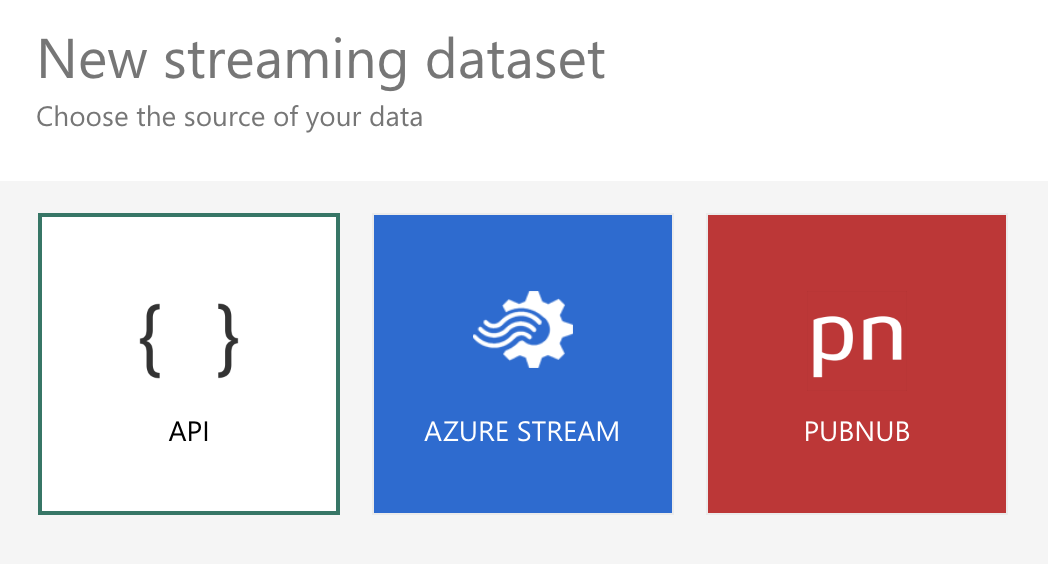
When creating a streaming dataset, we are immediately asked what attributes we want to have in this dataset. Whether via API or using Azure Stream, or using PUBNUB. The option of using the API is entirely sufficient for us now.
 Type of streams
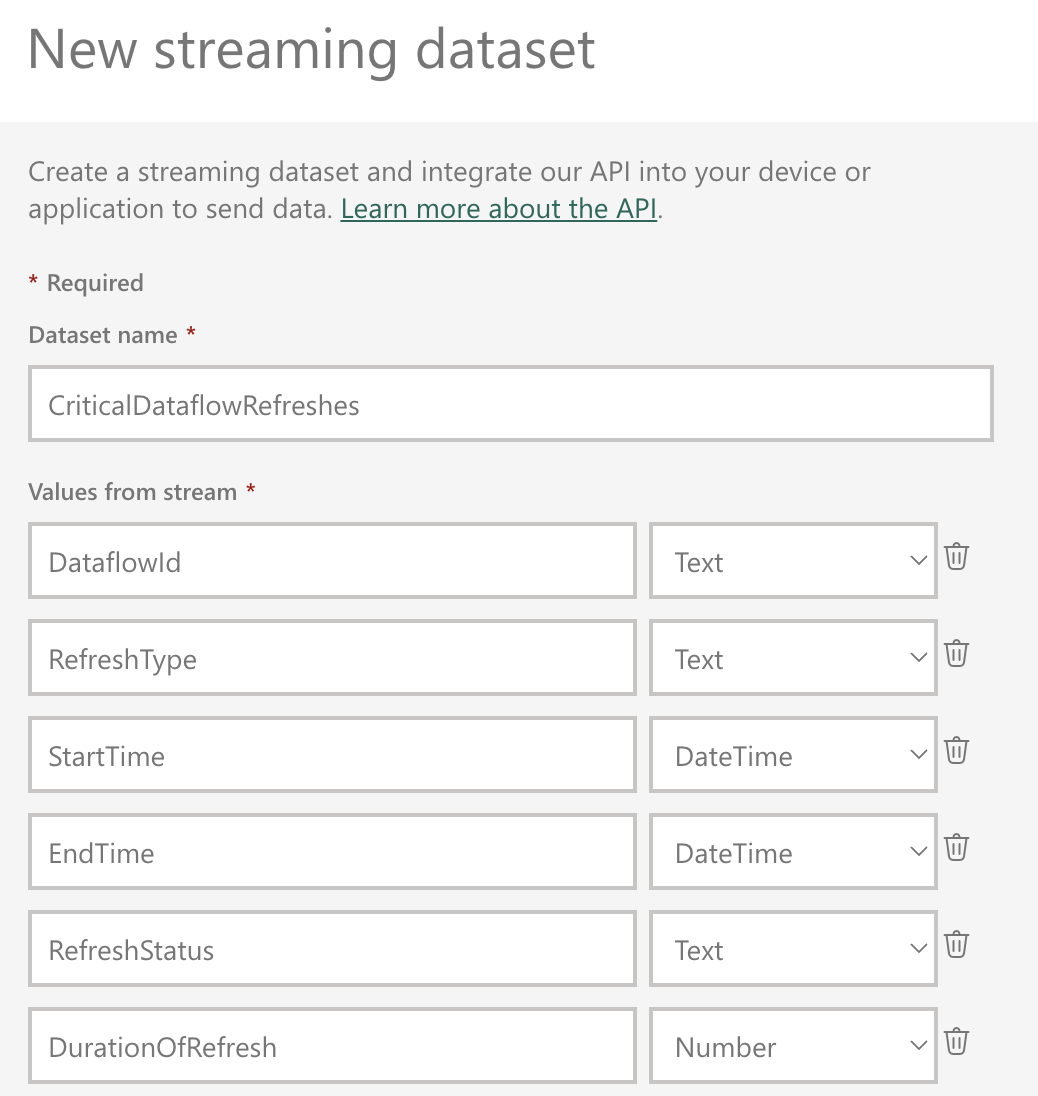
In the next step, you define the “columns” you want to have in the Push Dataset. At the moment, I’ll put all the ones that Power Automate gets us + an extra one that will calculate the duration of the update. In the same way, we could also add other columns that Power Automate could calculate or provide for us.
 Creation of Streaming Dataset
To do this, Power BI will generate a simple JSON sample of what content it expects to receive. Then, you can turn on historical analysis, and I recommend that you do so, so that the data is stored for us for a more extended period or a more considerable amount of time.
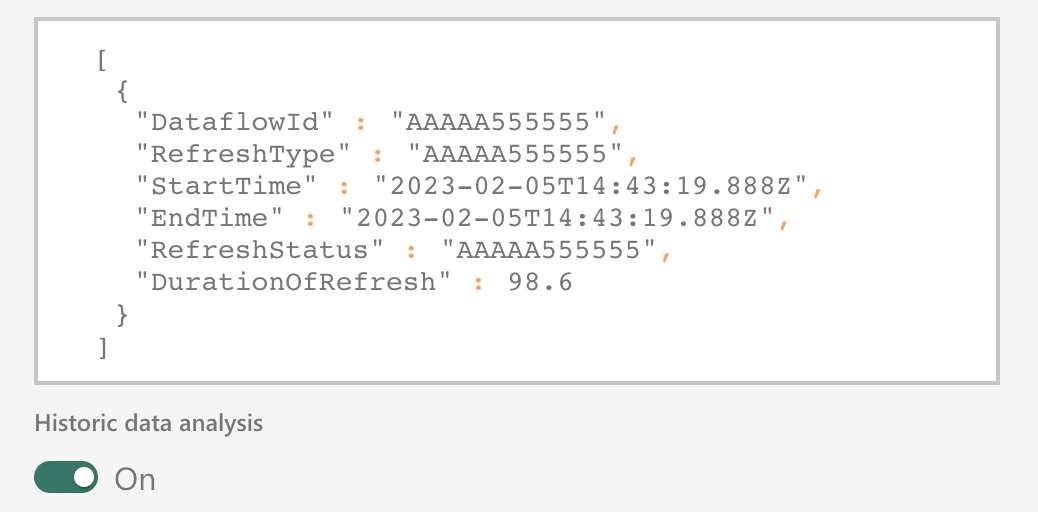 Generated JSON
After your confirmation, an API link will be created to which you can start sending your data. But we don’t need this link! Because Power Automate can capture and use this dataset itself. Specifically through “Add rows to a dataset.”
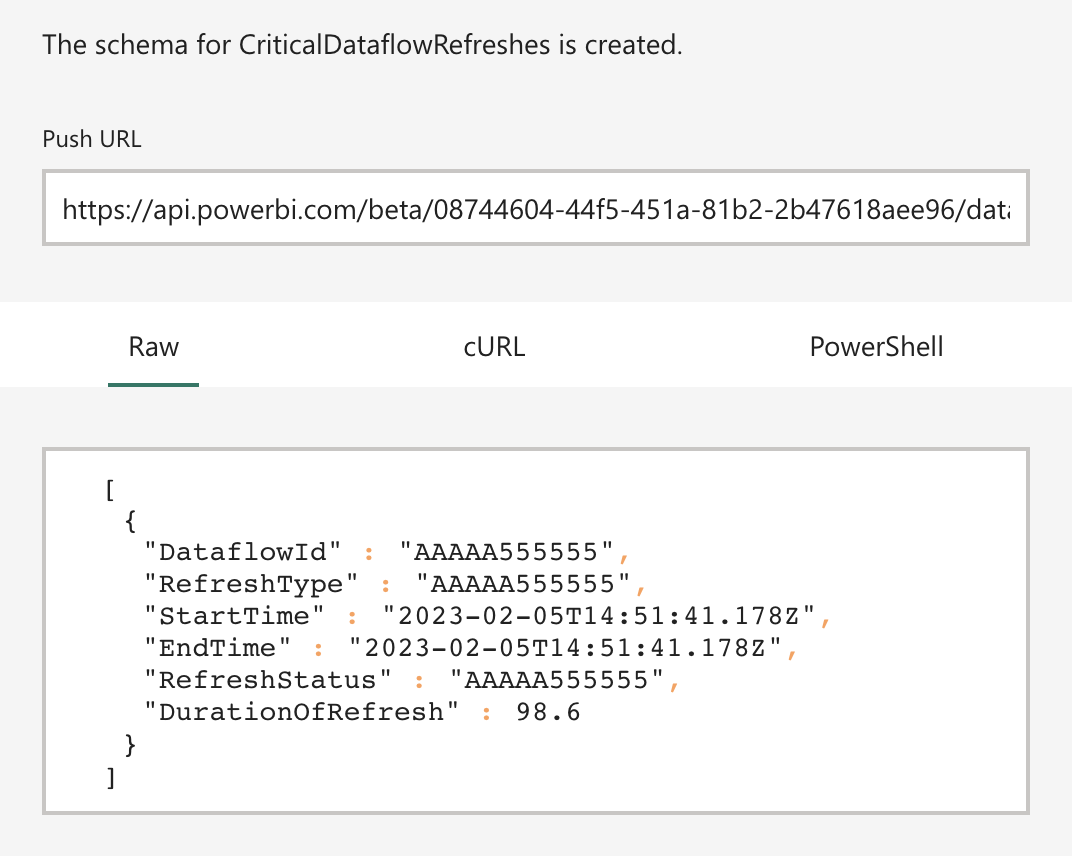 PUSH URL
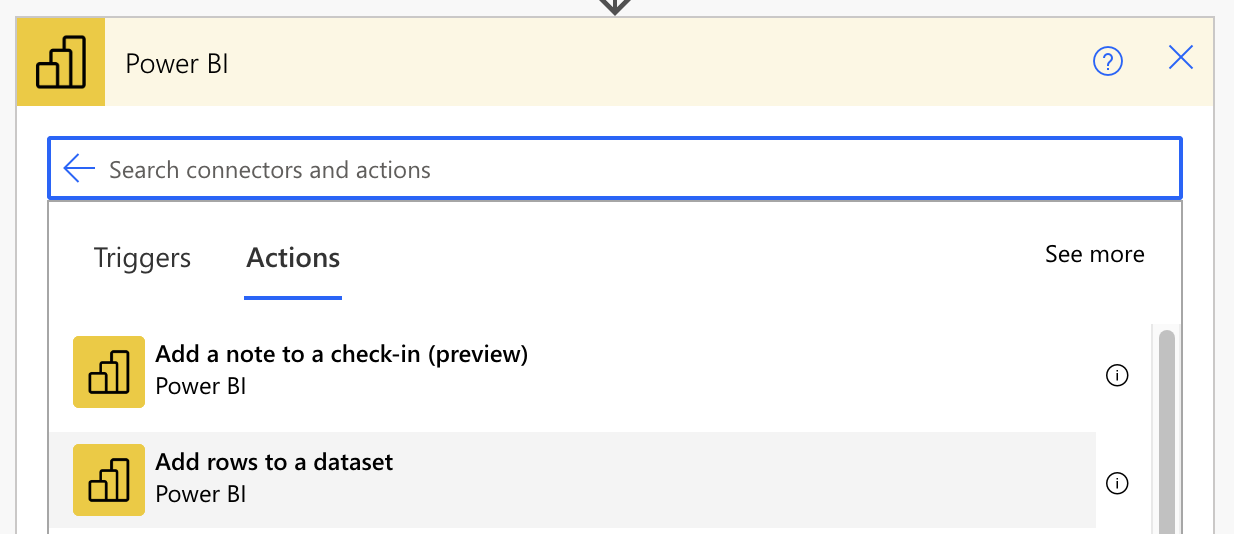 Power BI Actions
Once we’ve filled in the basic information about the location of our dataset, Power Automate will pull in the metadata, and we can populate it with our retrieved values. Except for the last attribute, because we still have to calculate it!
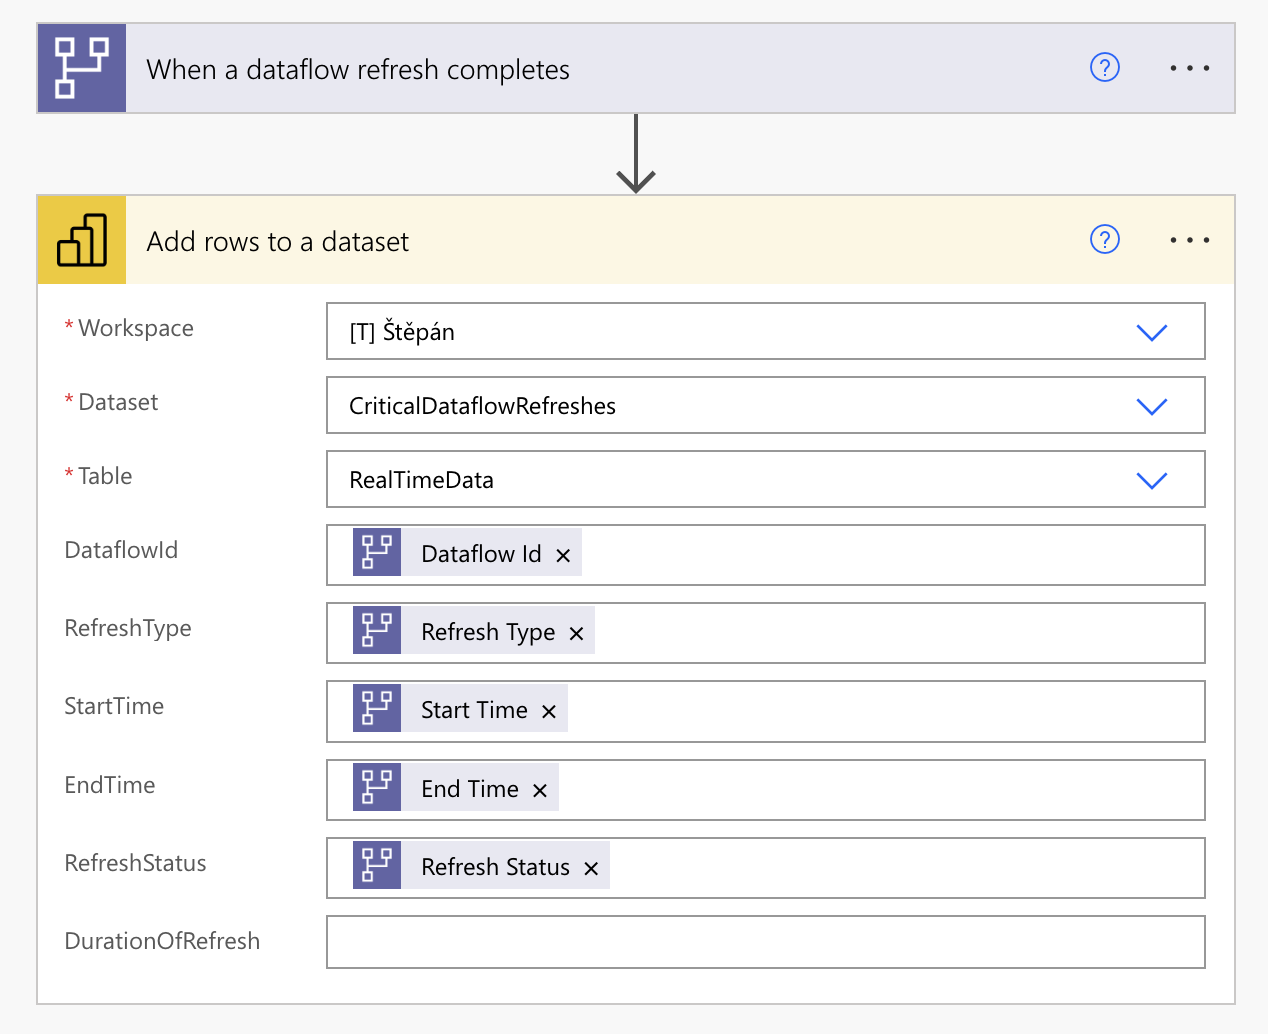 Inserted basic Attributes
To calculate the elapsed time, we can use the procedure mentioned by Tomáš Říha in his article: How to calculate the difference between two times in Power Automate. Specifically, it involves using a DateTime converter, which converts this format into “ticks,” which we subtract from each other and then divide by the required time quantity, as in this case for seconds (that’s why we divide by the number 10000000).
div(sub(ticks(triggerOutputs()?['body/endTime']),ticks(triggerOutputs()?['body/startTime'])),10000000)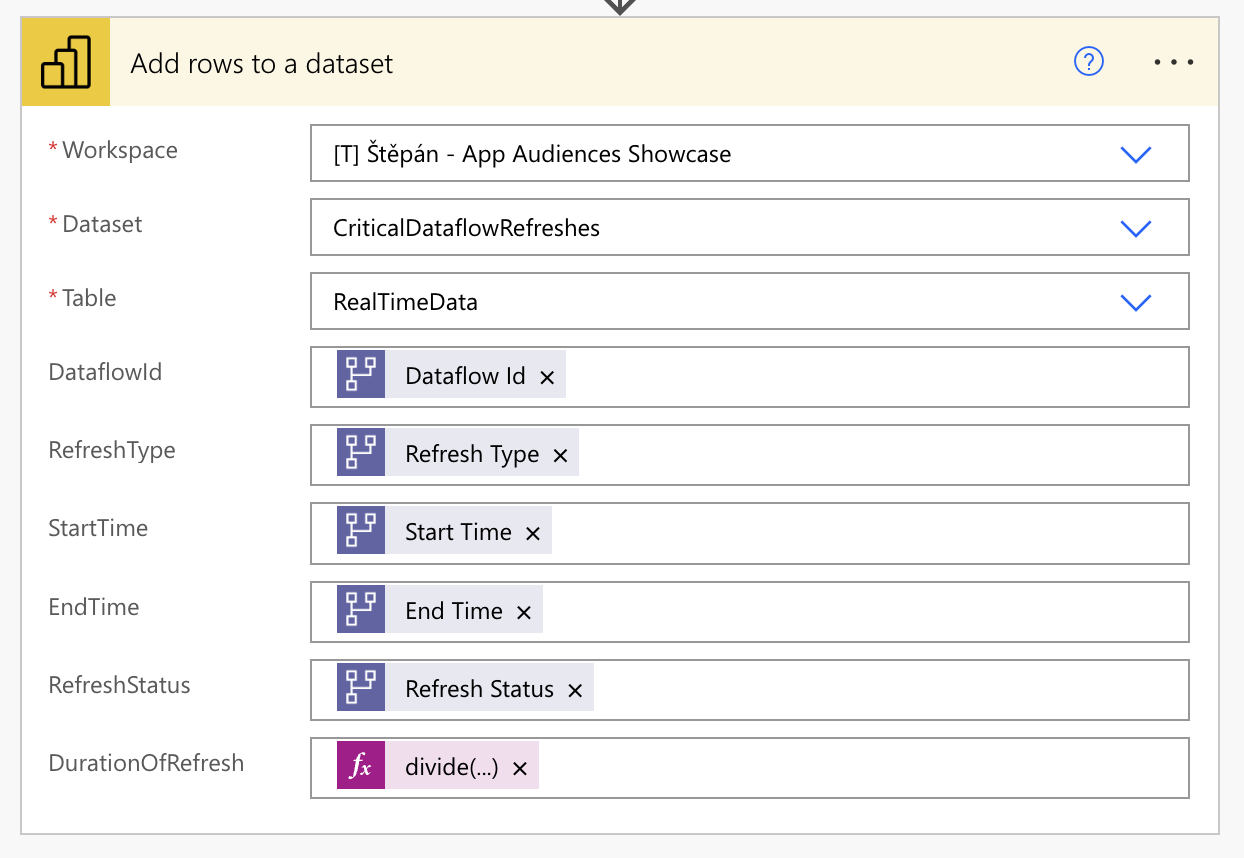 Inserted function
We can test the Flow by saving it and letting the Dataflow update. Then, if everything was successful, we could find the Flow we had just created in detail.
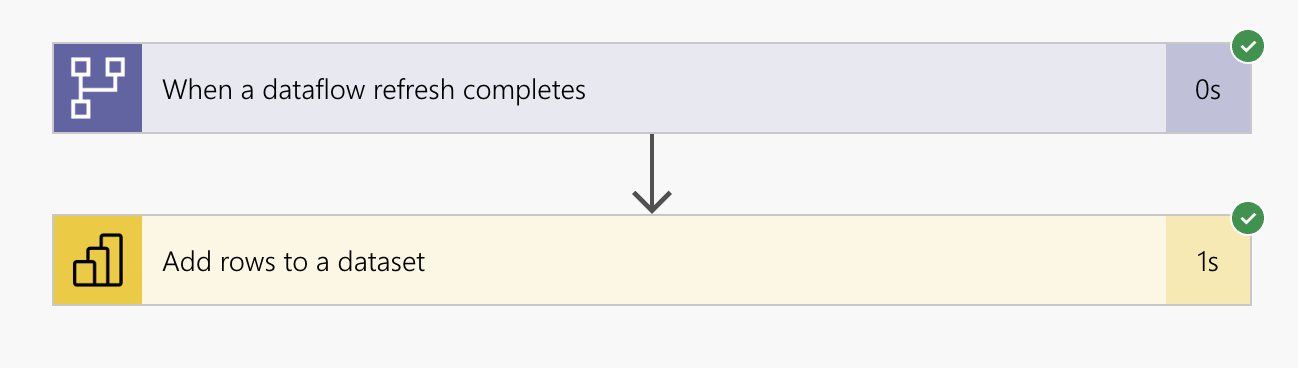 Test of created Flow
From this dataset, which stores data thanks to the historicization settings, we can start preparing a report that will provide us with the initially mentioned detail.
 Data in Dataset
I want to add a small example of how such a report can look like:
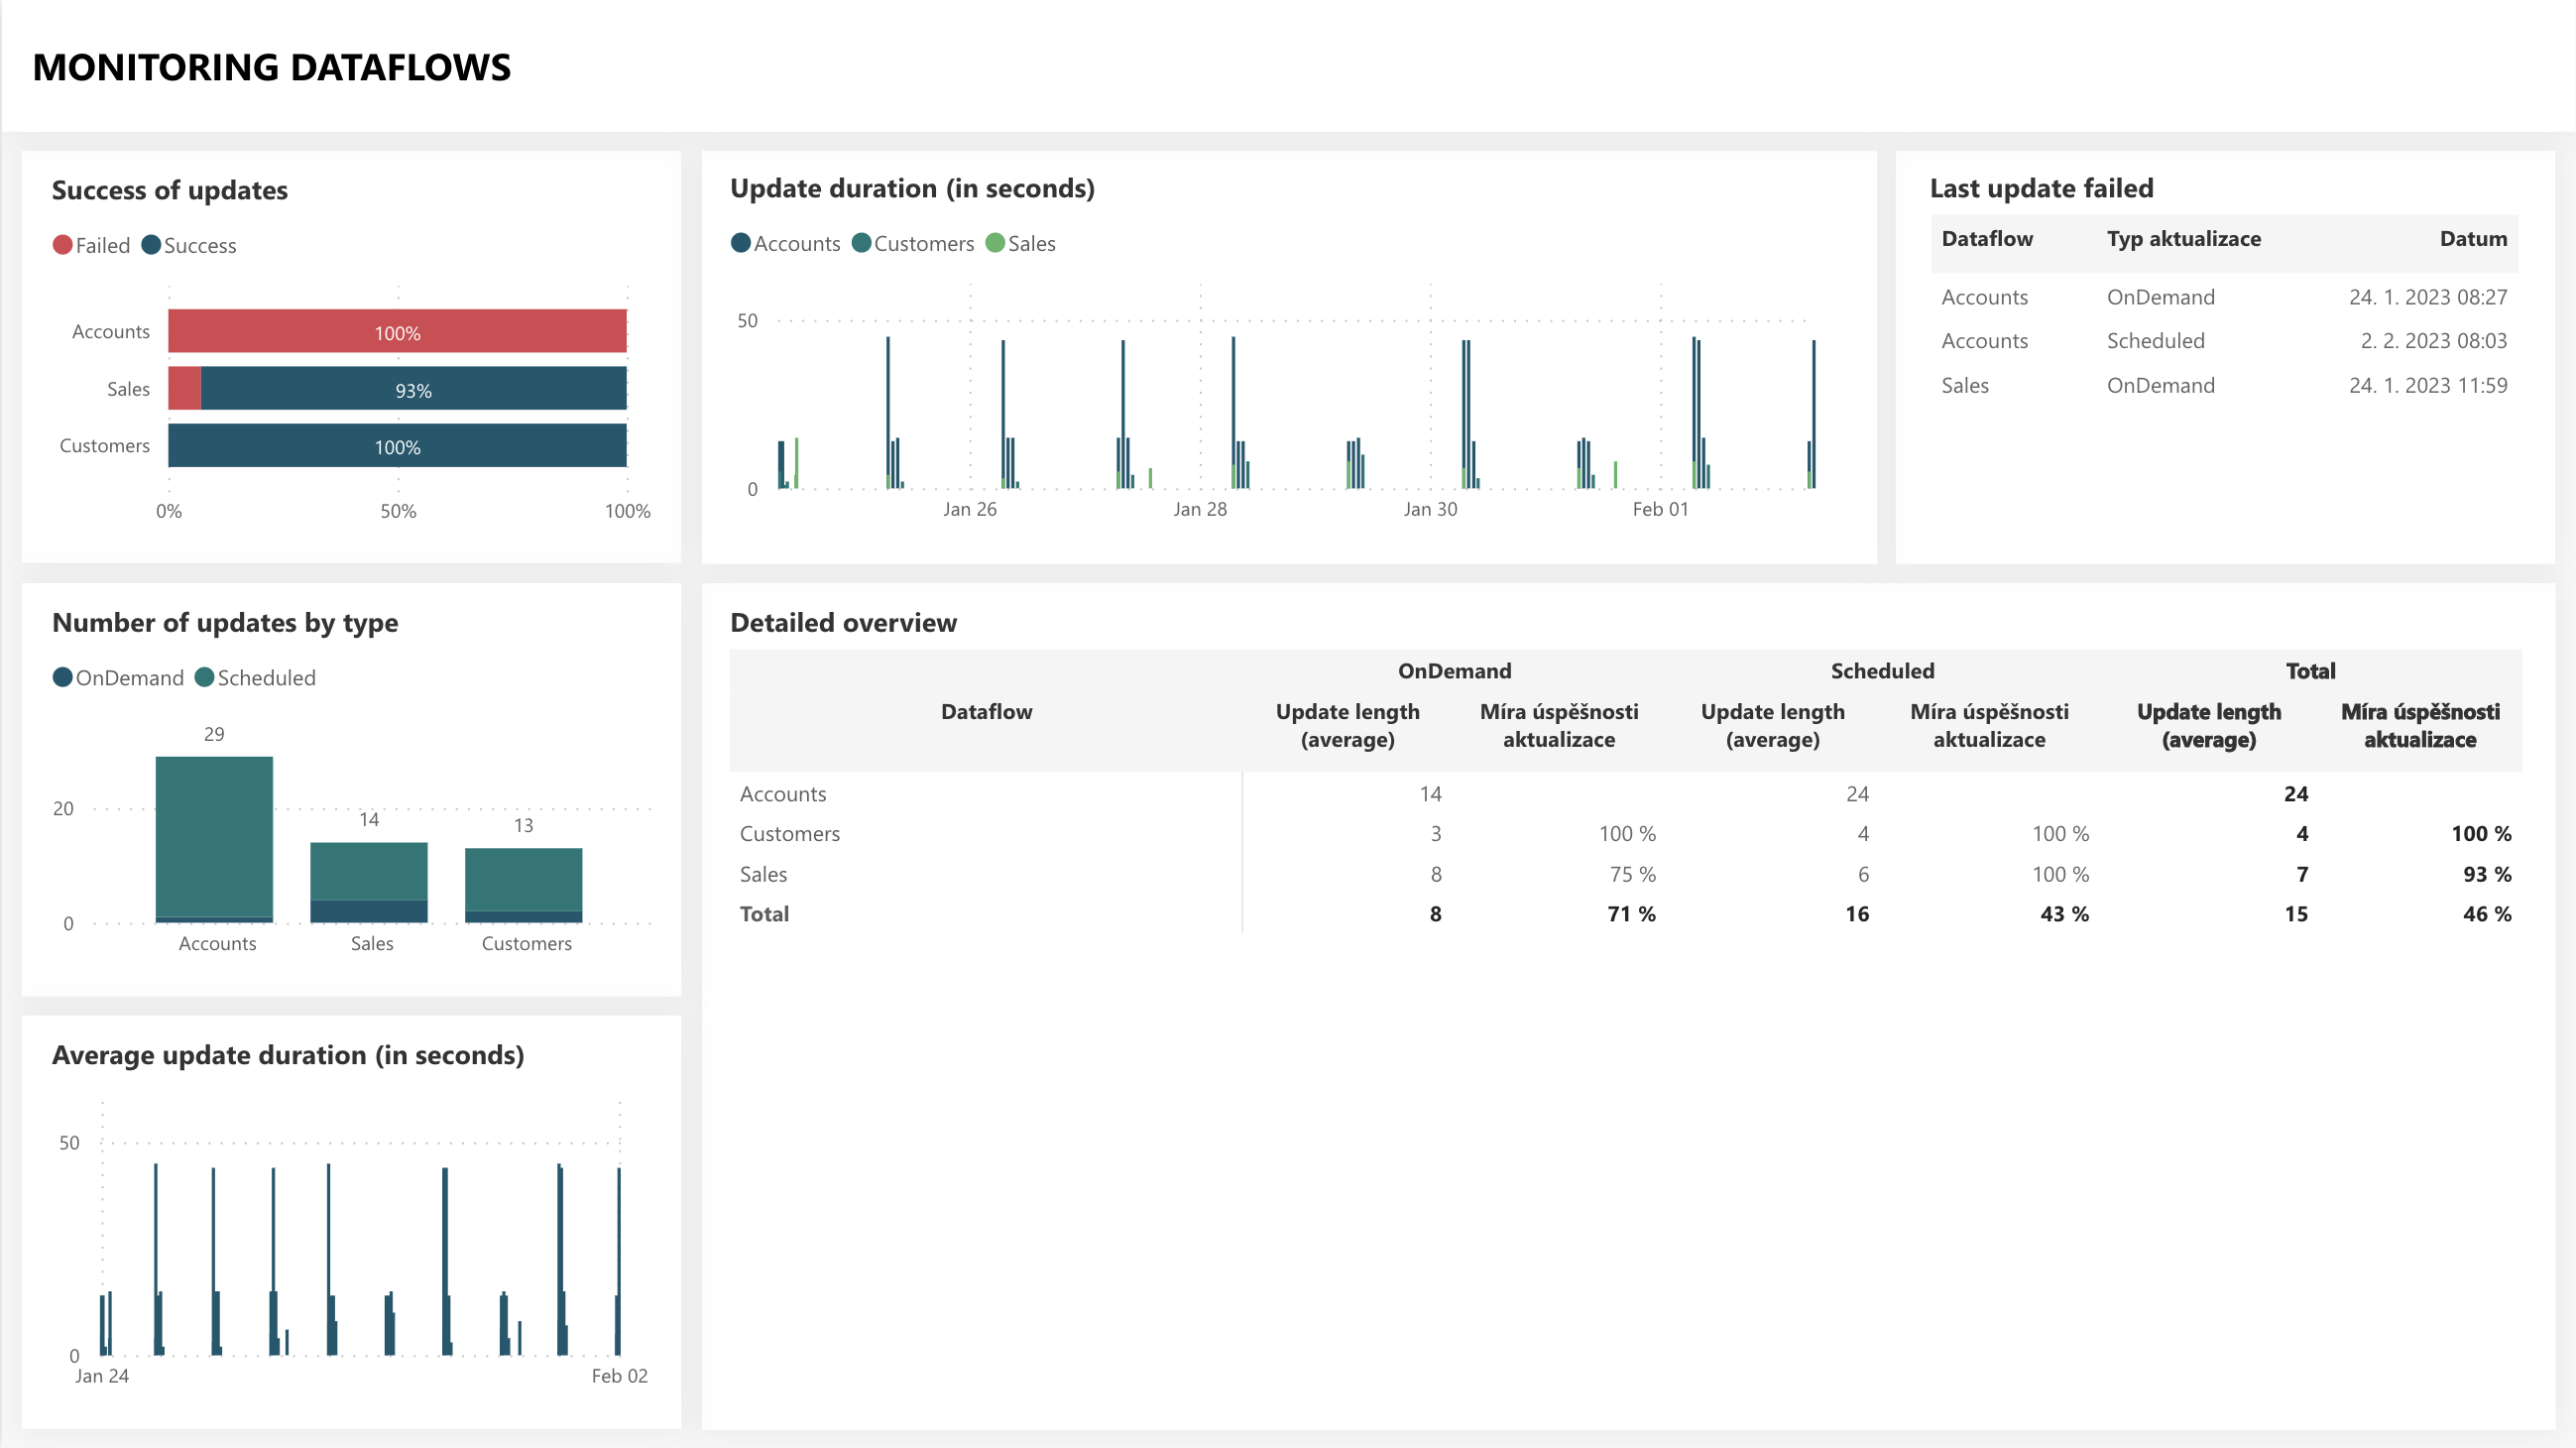 Showcase
You can of course connect to this dataset from Power BI Desktop and add your measures.
Adding a notification
Anyway, that still needs to be more! We are now receiving information about the dataflow update, and since we created the same Flow for other dataflows, our dataset is filled with data, and we have everything in one place. That’s great, but one piece of the puzzle needs to be included. Error notifications!
Here we leave the Power BI plane entirely because this is primarily a domain for Power Automate. There are many options for notifications. From a notification from the Power Automate application (if the user has it installed, to an e-mail message (but let’s face it, who reads these notifications…), to direct notifications to MS Teams. I spend a lot of time in MS Teams, so I prefer the notification here, so I will show you some options that can be used here.
So we need to extend our Flow with decision-making that tells when someone should be notified. What’s remarkable here is that the help within the return values tells us the states that can be returned to us so that we can use them!
 Refresh Statuses
Based on this, we can prepare a condition. At this moment, I will prepare it so that every time the Flow does not complete successfully, I will send a notification, so a simple condition is enough for me:
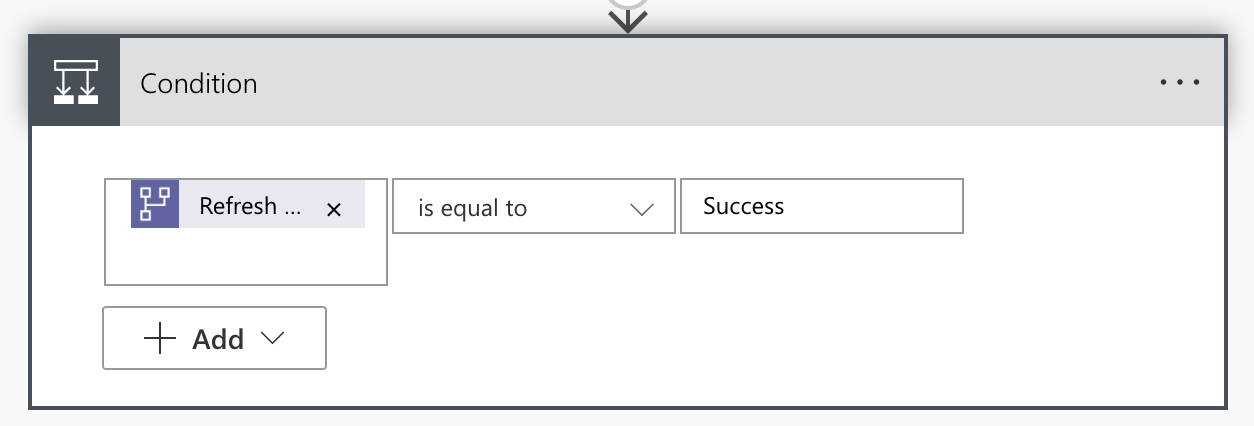 Condition in Power Automate
Within teams, we have more options for the message we want: a simple HTML message or an Adaptive card with, for example, a prompt and an action button. I prefer the second variant with an adaptive card because it requires more code, and the result is more fun.
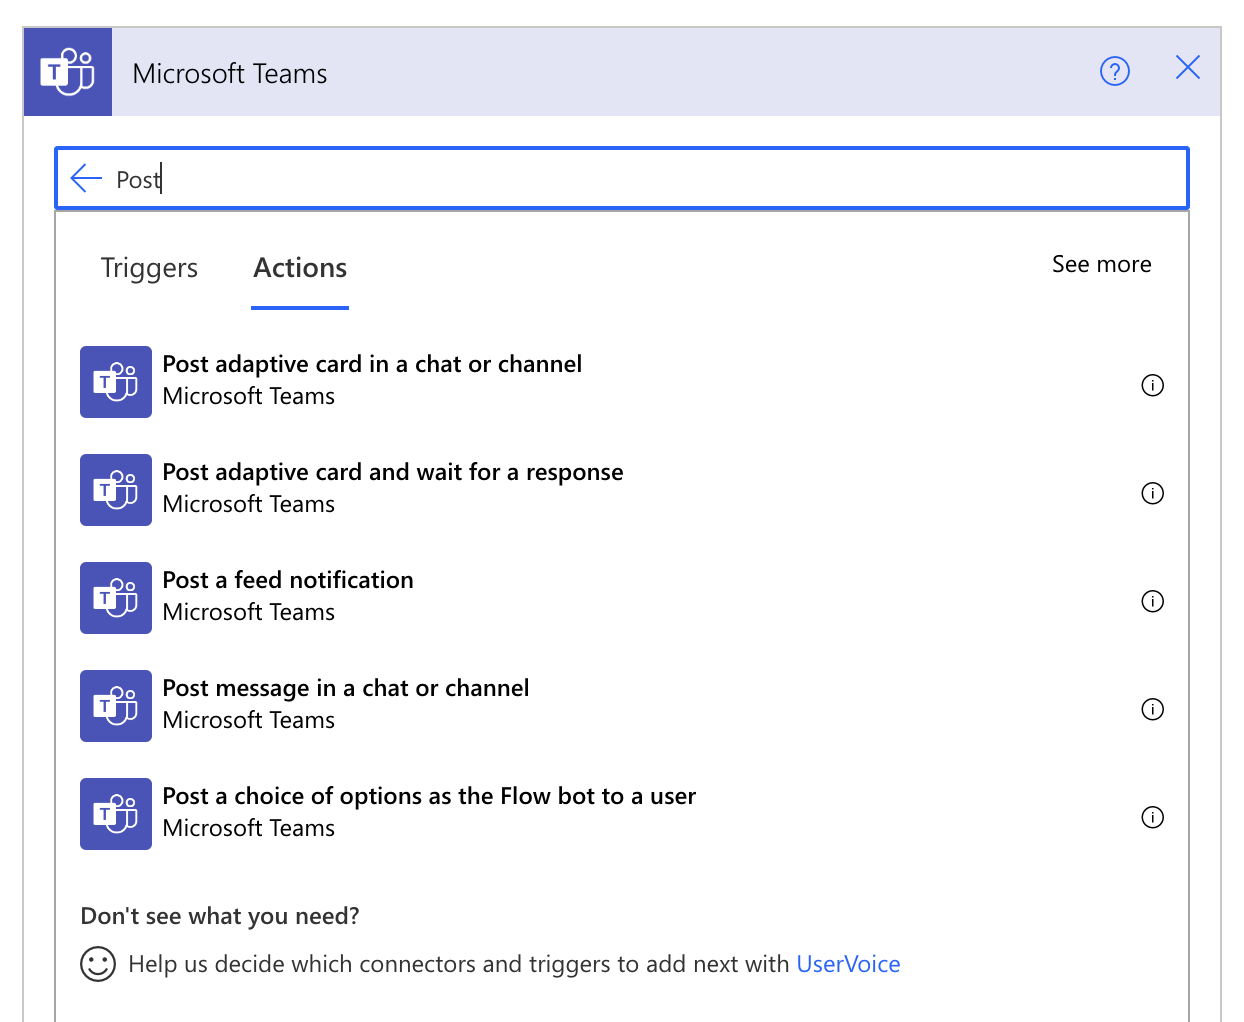 Post options of MS Teams Action
When creating an adaptive card, I recommend using its builder on the official website. Here you can prepare the card and transfer its code to Power Automate.
The card doesn’t have to be complicated. It is mainly about communicating the problem that has arisen and transferring a possible click-through to the Power BI Service Dataflow Settings, where the user can respond. So even if we can add pictures, emojis, etc., to the card… this simple design will suffice.
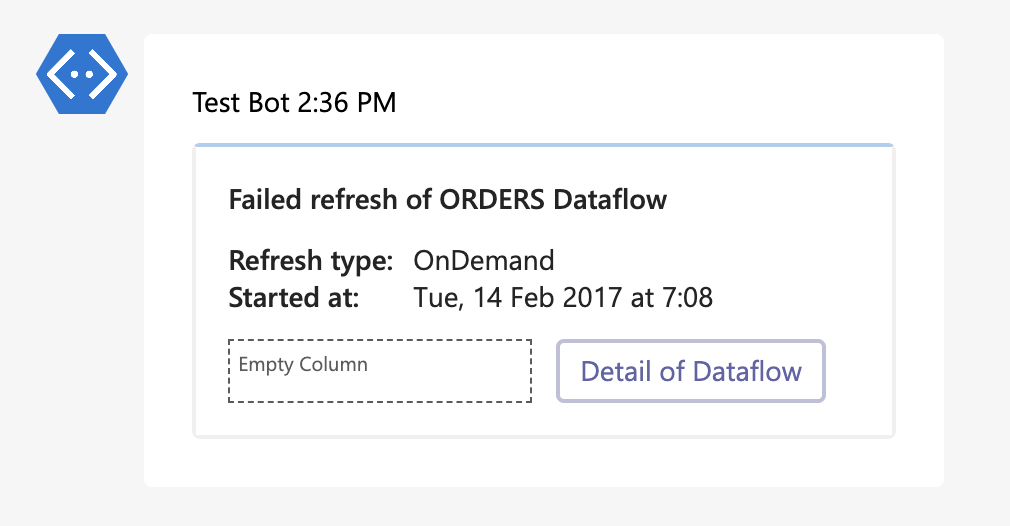 Preview of Adaptive Card
Prepared JSON to transfer to Power Automate:
{
    "type": "AdaptiveCard",
    "body": [
        {
            "type": "TextBlock",
            "size": "Medium",
            "weight": "Bolder",
            "text": "${title}"
        },
        {
            "type": "FactSet",
            "facts": [
                {
                    "title": "Refresh type:",
                    "value": "${refresh}"
                },
                {
                    "title": "Started at:",
                    "value": "\{\{DATE\($\{start\},SHORT\)\}\} at \{\{TIME\($\{start\}\)\}\}"
                }
            ]
        },
        {
            "type": "ColumnSet",
            "columns": [
                {
                    "type": "Column",
                    "width": "stretch"
                },
                {
                    "type": "Column",
                    "width": "stretch",
                    "items": [
                        {
                            "type": "ActionSet",
                            "actions": [
                                {
                                    "type": "Action.OpenUrl",
                                    "title": "Detail of Dataflow",
                                    "url": "${link}",
                                    "style": "destructive"
                                }
                            ]
                        }
                    ]
                }
            ]
        }
    ],
    "$schema": "http://adaptivecards.io/schemas/adaptive-card.json",
    "version": "1.4"
}
Unfortunately, MS Teams cannot support everything that Adaptive cards can do. At the same time, they have their requirements for formats and the like, so it is often better to define some transformations directly in Power Automate and pass only the results. For example, with that DateTime.
At the same time, you need to add a link to where the button will lead. For example, I direct it to the Settings of the given Dataflow.
{
    "type": "AdaptiveCard",
    "body": [
        {
            "type": "TextBlock",
            "size": "Medium",
            "weight": "Bolder",
            "text": "@{concat(concat(concat(triggerOutputs()?['body/status'],'ed fresh of '),triggerOutputs()?['body/dataflowName']),' dataflow')}"
        },
        {
            "type": "FactSet",
            "facts": [
                {
                    "title": "Refresh type:",
                    "value": "@{triggerOutputs()?['body/refreshType']}"
                },
                {
                    "title": "Started at:",
                    "value": "@{formatDateTime(triggerOutputs()?['body/startTime'],'ddd, MM yyyy hh:mm:ss')}"
                }
            ]
        },
        {
            "type": "ColumnSet",
            "columns": [
                {
                    "type": "Column",
                    "width": "stretch"
                },
                {
                    "type": "Column",
                    "width": "stretch",
                    "items": [
                        {
                            "type": "ActionSet",
                            "actions": [
                                {
                                    "type": "Action.OpenUrl",
                                    "title": "Detail of Dataflow",
                                    "url": "https://app.powerbi.com/groups/YOUR-WORKSPACE-ID/settings/dataflows/YOUR-DATAFLOW-ID",
                                    "style": "destructive"
                                }
                            ]
                        }
                    ]
                }
            ]
        }
    ],
    "$schema": "http://adaptivecards.io/schemas/adaptive-card.json",
    "version": "1.4"
}
So if our Dataflow fails now:
 Refresh Error
So Power Automate starts and sends us this notification:
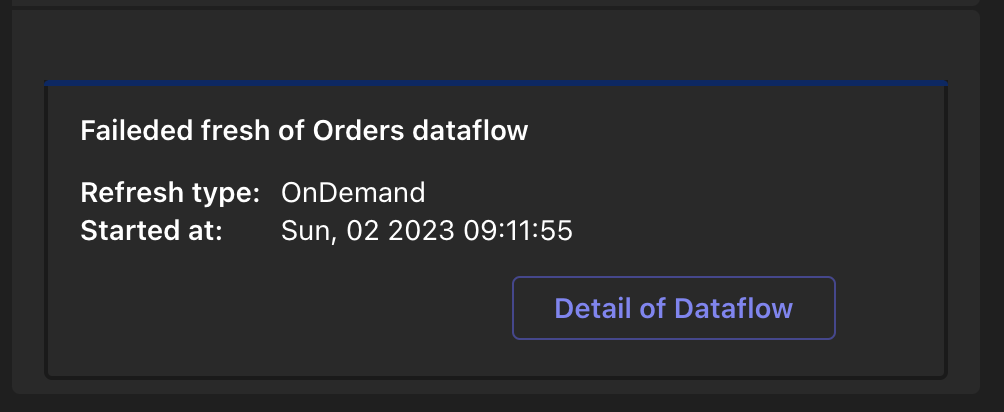 Sent notification
And the button from it redirects us to the settings, where we can also find out the details of the updates. Well, isn’t that great? This way, you can save time by searching if something has fallen, where it is, etc.
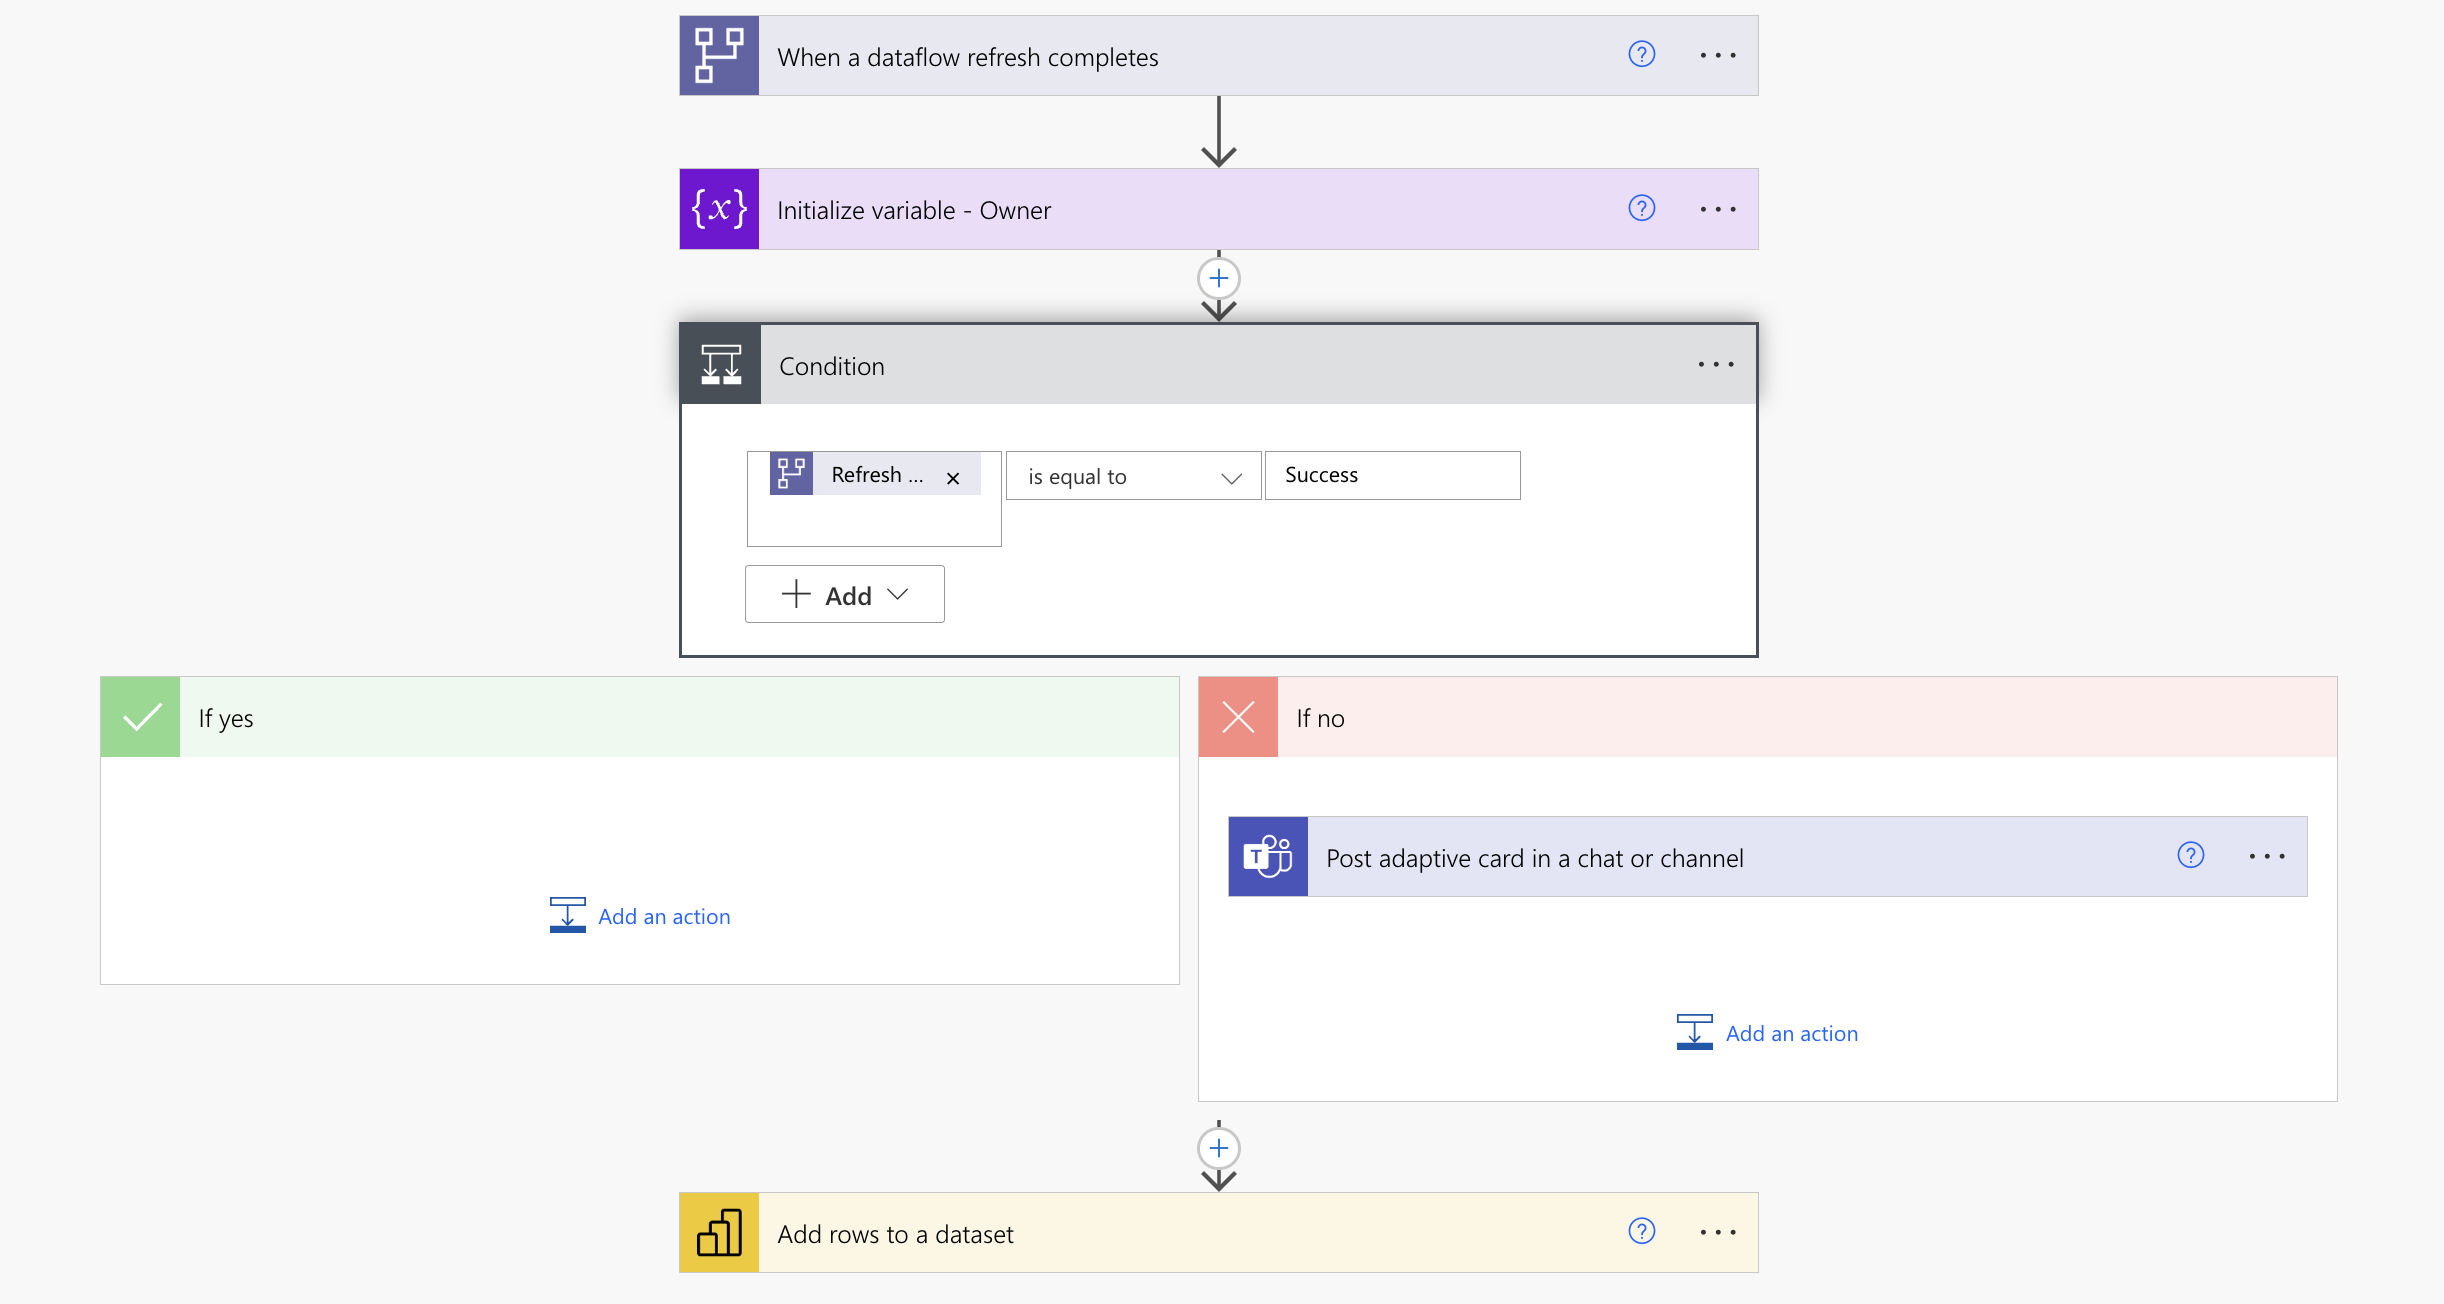 Showcase of complete Flow
General monitoring via Power BI REST API
In addition to critical dataflows, we may also want to monitor other dataflows, where a certain degree of delay will suffice, and we will only need to see some things after a certain point.
At the same time, it’s an opportunity to look at another option to get these updates!
The second option (not the last) is through the Power BI REST API, where we are interested in this endpoint - Dataflow Transactions
curl --location --request GET 'https://api.powerbi.com/v1.0/myorg/groups/{WORKSPACE-ID}/dataflows/{DATAFLOW-ID}/transactions' \
--header 'Authorization: Bearer token' \
This endpoint can get updates on the selected Dataflow. It can also be nicely wrapped into some script that gets individual dataflows and then gradually gets individual updates for them and saves them in some resulting file/database.
It returns data approximately similar to those that come from Power Automate:
{
    "@odata.context": "",
    "value": [
        {
            "id": "",
            "refreshType": "ViaApi",
            "startTime": "",
            "endTime": "",
            "status": "Success"
        },
        {
            "id": "",
            "refreshType": "OnDemand",
            "startTime": "",
            "endTime": "",
            "status": "Success"
        },
        {}
    ]
}
This variant will also be subject to the need to log in either by the user or the Service Principal.
That is all that is necessary to say about this variant. I will be pleased if you ever share your creations from it publicly.
Summary
Every critical point within your data architecture should be monitored, and mechanisms should be created that will allow you to prevent outages or disruptions or at least create the possibility to respond promptly to the situation. Power BI takes care of it for you, so if something fails, at least you have historical data, and it notifies you anyway. So they are trying to fulfill this need for you. However, time moves forward, so it is necessary to reach for more actionable variants than E-mail. At the same time, monitoring all critical points in one central place is crucial so that work is not unnecessarily added at moments when it is least convenient.